Monday, October 28, 2013
Pinned it, Made it! Monday ~ Week 60 ~

Labels:
linky party,
Pinned it Made it Monday,
pinterest
Tuesday, October 22, 2013
Pinned it, Made it! Monday ~ Week 59 ~
I know it's Tuesday, but I guess better a day late with Pinned it, Made it! Monday than to skip all together! We spent 4 days out of town (in Alabama) and then Luke got sick when we got home and also had an allergic reaction to something. He's on the mend, but I'm just getting the chance to sit down at my computer to do a post. How's all my blogging friends? Even if you don't see me around, I think about you!

This week for Pinned it, Made it! Monday, I'm sharing a pumpkin idea. I'm pretty sure I came across this while browsing Pinterest and just didn't pin it at the time. I saw it on the internet somewhere! :) When I saw it and showed Luke, he made up his mind right then and there that this year that was what he wanted to do with a pumpkin. They used Mr. Potato Head parts to decorate a pumpkin!
So we were both thrilled when we saw an adorable Mr. Potato Head pirate kit at the pumpkin patch we visited Saturday. He picked out his pumpkin and the pirate kit came home with us! He asked could we decorate it as soon as we got in from Alabama and I'm so glad we did because early Monday morning, he was sick, bless his heart!
Anyway, here's the kit we used:
With a little help from daddy, he created his pirate pumpkin and gave him the name of "Captain". Captain now has a place of honor in our foyer. He greets folks at the front door. :)
If you would like to share something you've pinned and made from Pinterest, we'd love to see. Just link up your project below!
Thanks so much for stopping by and have a great week! :)
♥ Tammy ♥
Labels:
linky party,
Pinned it Made it Monday,
pinterest
Sunday, October 13, 2013
Pinned it, Made it! Monday ~ Week 58 ~
Remember me? :) Gosh, it's been awhile! We had a GREAT time on our vacation to Disney World. It was truly magical just as they say! :) We went full force though so we have been trying to catch up on rest and get back to school! I can't wait to share some some photos from the trip with you!
But now it's time for Pinned it, Made it Monday! And this week, I'm not sharing something that I pinned and made but something that I've made and am pinning to my Sweet Treats board because I want to share it with Pinterest World! :)
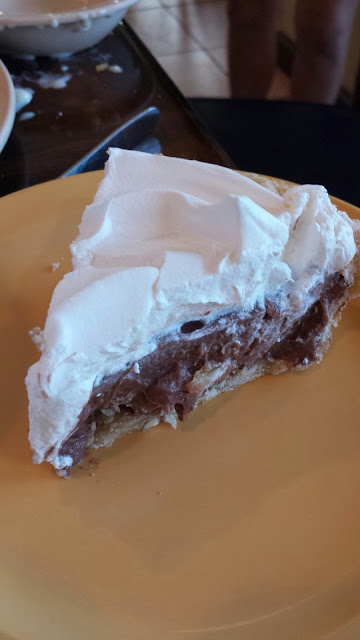
All the years growing up that we spent going to my Aunt Jo's house every Thanksgiving and Christmas, she would make chocolate pies. Everyone always LOVED her chocolate pies and made sure to save room for a piece. Now she's always been an excellent cook too and we would ask about her pie recipe and she never told for years....always acted really secretive about it. Well, a few years ago, she laughed and shared her "secret recipe". And we couldn't believe it was actually this easy....all those years! Now she also made her own pie crusts and generally I buy store bought, but either way it's good!

Are you ready for it? :)
Aunt Jo's Chocolate Pie
Ingredients (for 1 pie):
1 large box of Chocolate Cook and Serve Pudding
1 can of Pet or Carnation Milk
Whole Milk
Cool Whip (taken out of the freezer so it can thaw a little)
Deep Dish Pie Crust (Homemade or Store Bought)
Yep, that's it! Her "trick" the entire time was adding the Pet or Carnation Milk.
So here's what you do:
Go ahead and bake your pie crusts (whether they are homemade or store bought). The ones I made today were store bought so I baked them according to the directions on the package. After they are done, let them a cool a bit while you're working on the filling for the pies.
In a mixing bowl, pour in your LARGE box of chocolate cook and serve pudding. Fill up a 1 cup measuring cup with the Pet Milk. Then pour what remains of the Pet Milk can in the 1 cup again filling it the rest of the way with whole milk, making it an entire cup again. That gives you two cups so far. Then add 1 cup of regular whole milk. This combination makes 3 cups of the Pet Milk/Whole Milk Combo. Stir well.
Now here's the hard part! Haha! You cook it in the microwave! :) Really! In the microwave!
Cook on high for 2 minutes. Stir.
Cook on high for 2 more minutes. Stir.
Cook on high for 2 more minutes. Stir.
Cook on high for 1 more minute. Stir.
And now it's ready to pour into your (somewhat) cooled pie shell. Now you will want to wait and add your cool whip closer to serving time. So after you pour the filling in the crust, tear off a piece of plastic wrap and place over the chocolate filling portion only, trying to push out as many bubbles as you can. This keeps it from getting a skim on top. You can turn the plastic wrap back on the edges so that it's not touching the pie crust at all, only on the filling part.
Then closer to time for serving, add your cool whip. This can be the night before, two hours before, or 30 minutes before. I've done it all of these ways but I seem to prefer the 2 hours or so before or even less if need be.
Refrigerate.
Enjoy!
Now you know my Aunt Jo's secret chocolate pie recipe! :)
If you would like to participate in Pinned it, Made it Monday, just link up your Pinterest project below! And thank you in advance!
By the way, the pies I made today (I made two of them) were for Jason's birthday celebration. His birthday is tomorrow (Monday the 14th). So I'd also like to wish my hubby a Happy Happy Birthday! He's turning 53! I'm so blessed he's mine! Thank you, Jason, for everything you do! I love you honey! :)
But now it's time for Pinned it, Made it Monday! And this week, I'm not sharing something that I pinned and made but something that I've made and am pinning to my Sweet Treats board because I want to share it with Pinterest World! :)
All the years growing up that we spent going to my Aunt Jo's house every Thanksgiving and Christmas, she would make chocolate pies. Everyone always LOVED her chocolate pies and made sure to save room for a piece. Now she's always been an excellent cook too and we would ask about her pie recipe and she never told for years....always acted really secretive about it. Well, a few years ago, she laughed and shared her "secret recipe". And we couldn't believe it was actually this easy....all those years! Now she also made her own pie crusts and generally I buy store bought, but either way it's good!

Are you ready for it? :)
Aunt Jo's Chocolate Pie
Ingredients (for 1 pie):
1 large box of Chocolate Cook and Serve Pudding
1 can of Pet or Carnation Milk
Whole Milk
Cool Whip (taken out of the freezer so it can thaw a little)
Deep Dish Pie Crust (Homemade or Store Bought)
Yep, that's it! Her "trick" the entire time was adding the Pet or Carnation Milk.
So here's what you do:
Go ahead and bake your pie crusts (whether they are homemade or store bought). The ones I made today were store bought so I baked them according to the directions on the package. After they are done, let them a cool a bit while you're working on the filling for the pies.
In a mixing bowl, pour in your LARGE box of chocolate cook and serve pudding. Fill up a 1 cup measuring cup with the Pet Milk. Then pour what remains of the Pet Milk can in the 1 cup again filling it the rest of the way with whole milk, making it an entire cup again. That gives you two cups so far. Then add 1 cup of regular whole milk. This combination makes 3 cups of the Pet Milk/Whole Milk Combo. Stir well.
Now here's the hard part! Haha! You cook it in the microwave! :) Really! In the microwave!
Cook on high for 2 minutes. Stir.
Cook on high for 2 more minutes. Stir.
Cook on high for 2 more minutes. Stir.
Cook on high for 1 more minute. Stir.
And now it's ready to pour into your (somewhat) cooled pie shell. Now you will want to wait and add your cool whip closer to serving time. So after you pour the filling in the crust, tear off a piece of plastic wrap and place over the chocolate filling portion only, trying to push out as many bubbles as you can. This keeps it from getting a skim on top. You can turn the plastic wrap back on the edges so that it's not touching the pie crust at all, only on the filling part.
Then closer to time for serving, add your cool whip. This can be the night before, two hours before, or 30 minutes before. I've done it all of these ways but I seem to prefer the 2 hours or so before or even less if need be.
Refrigerate.
Enjoy!
Now you know my Aunt Jo's secret chocolate pie recipe! :)
If you would like to participate in Pinned it, Made it Monday, just link up your Pinterest project below! And thank you in advance!
******************************
By the way, the pies I made today (I made two of them) were for Jason's birthday celebration. His birthday is tomorrow (Monday the 14th). So I'd also like to wish my hubby a Happy Happy Birthday! He's turning 53! I'm so blessed he's mine! Thank you, Jason, for everything you do! I love you honey! :)
And thank YOU for stopping by today! Have a wonderful week! :)
Labels:
linky party,
Pinned it Made it Monday,
pinterest
Subscribe to:
Comments (Atom)


.jpeg)


